In this article, we will cover how to issue, redeem, and edit vouchers within ThriftCart.
Issuing vouchers:
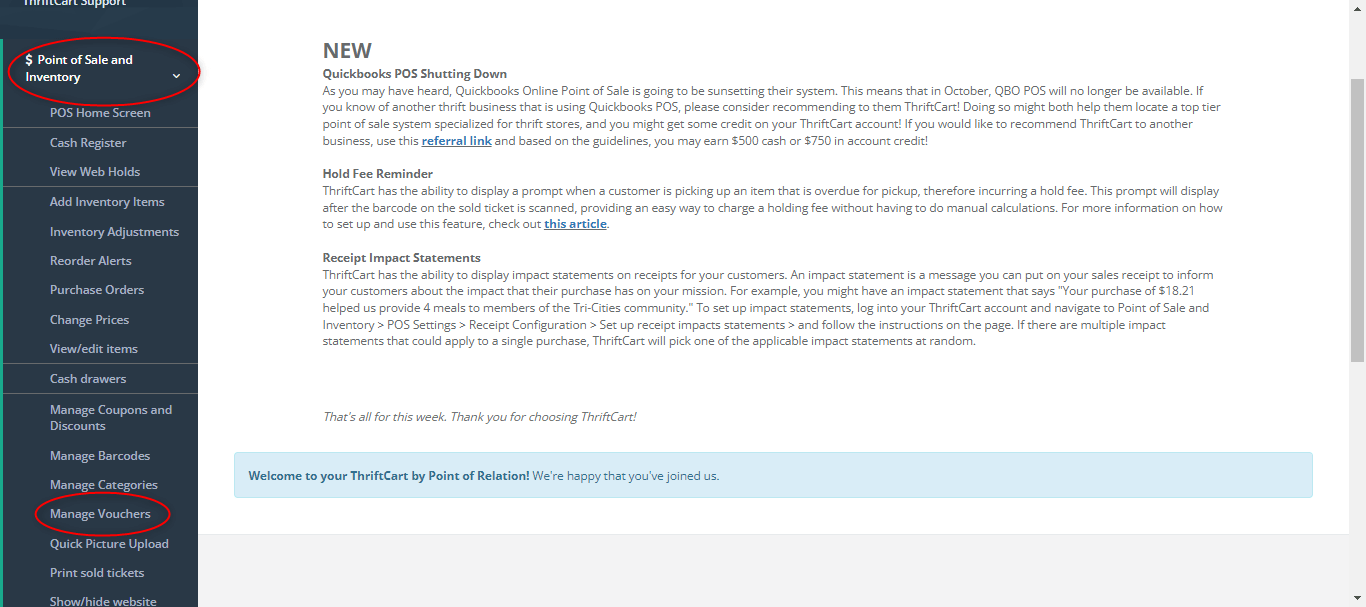
1) To issue a voucher, begin by navigating to Point of Sale and Inventory > Manage Vouchers.
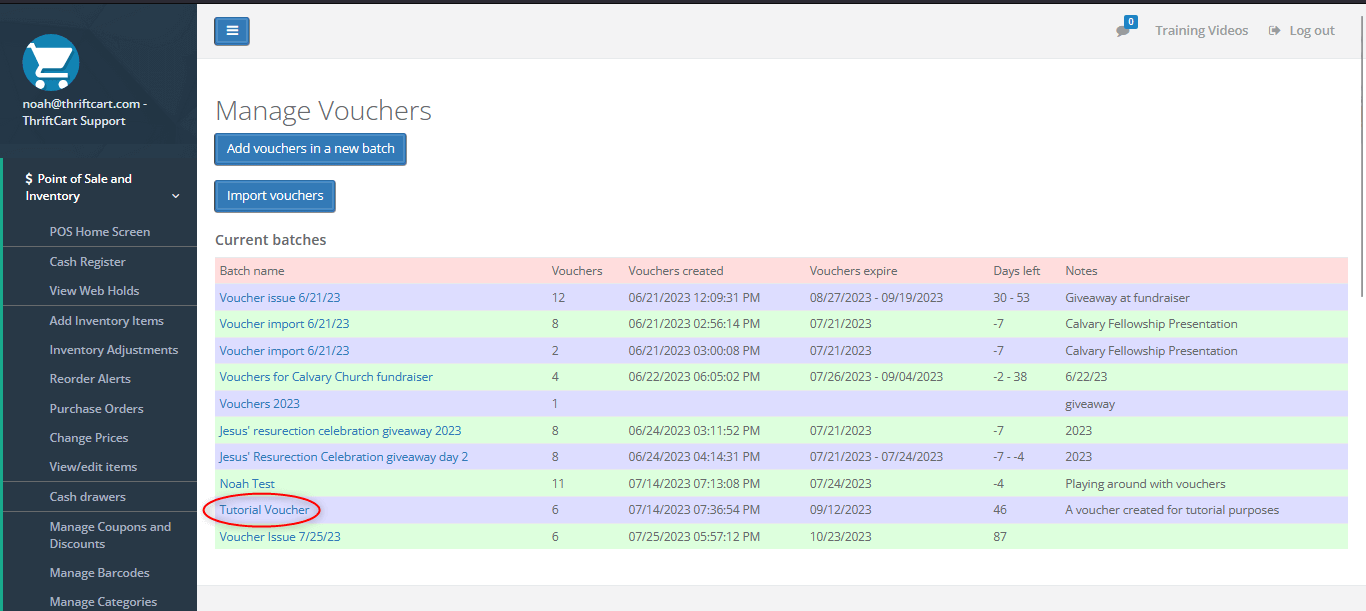
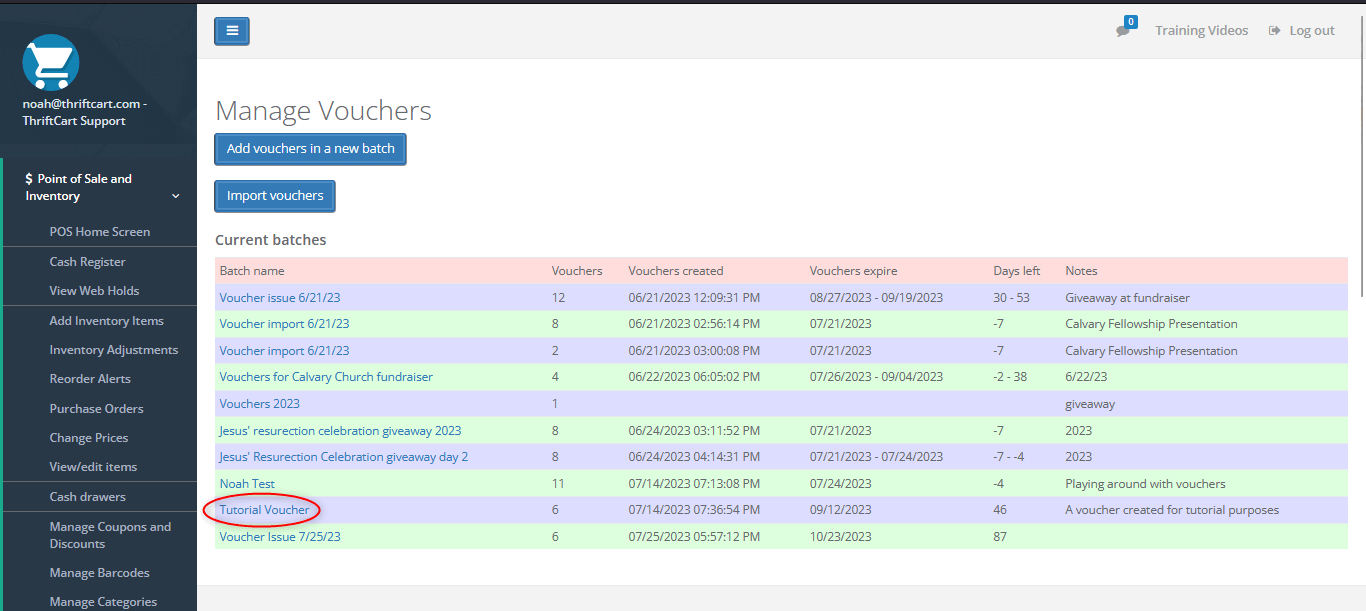
2) On this page, you view and manage any previous batches of vouchers that have been created. You also have the option to add a new batch of vouchers and to import vouchers from a .CSV file. In this article we will just walk through adding a new vouchers manually and redeeming vouchers.
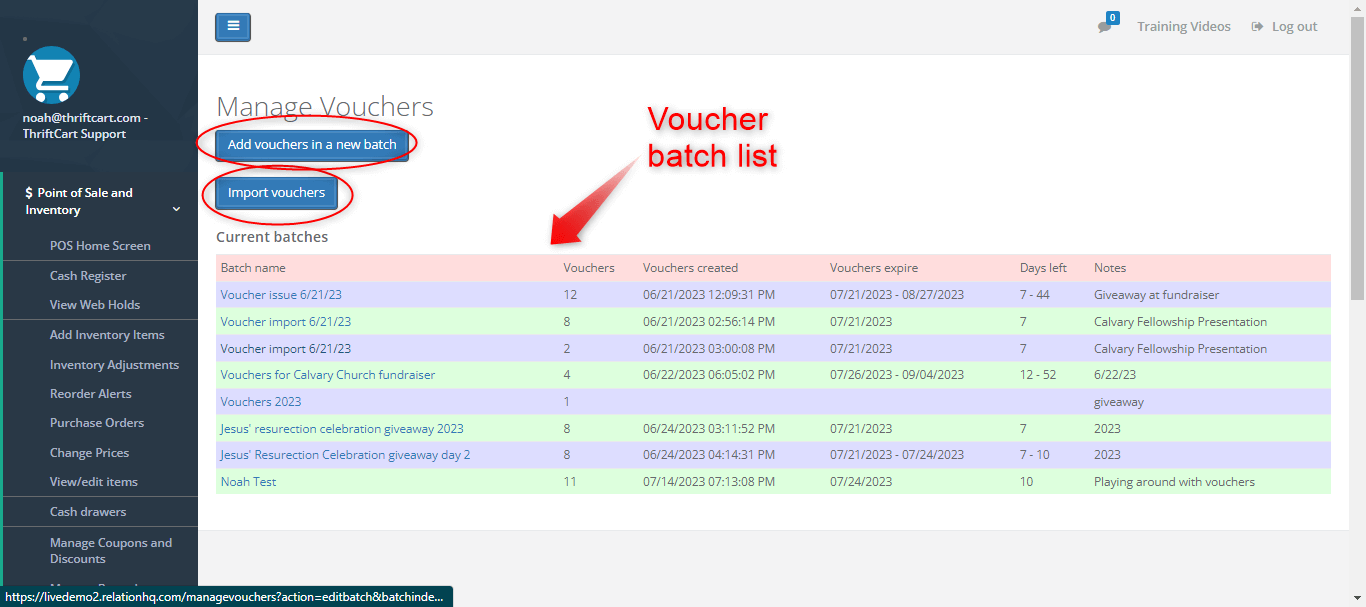
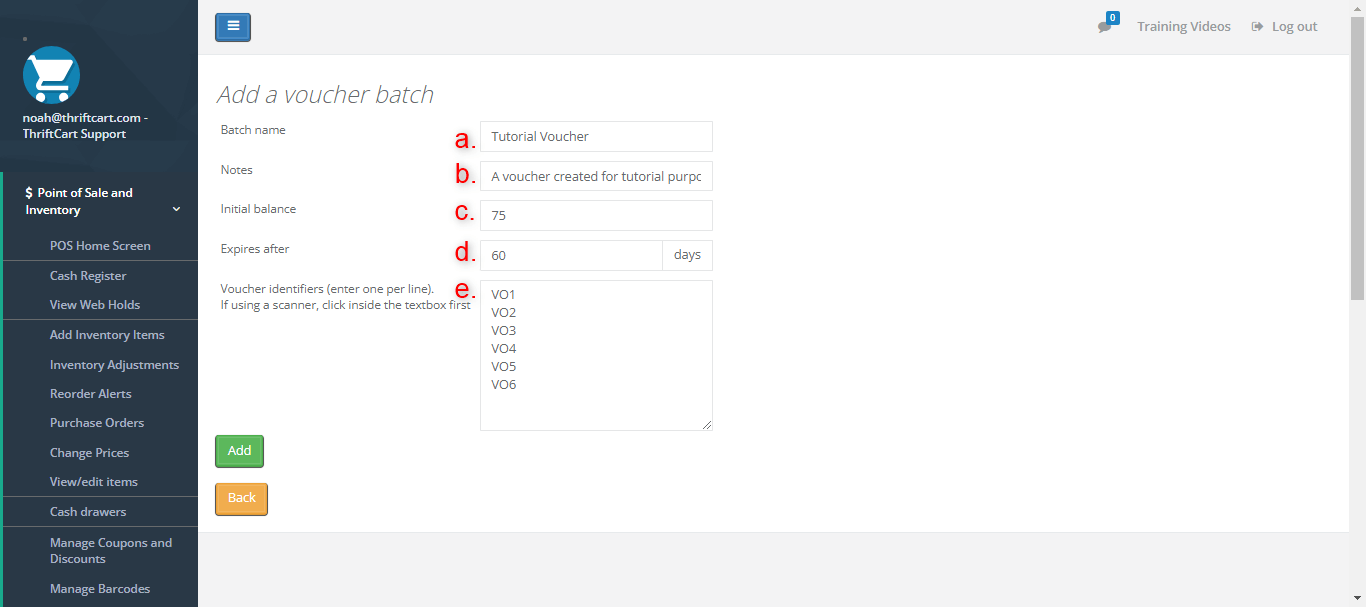
3) First, select the Add vouchers in a new batch button. You will then be directed to enter information for the vouchers you are issuing.
a. The first field is the name that should identify this batch (set) of vouchers.
b. This field is for any further description or notes on this voucher batch.
c. This field is where you enter the monetary value of each voucher being issued.
d. This field is where you enter the amount of time until these vouchers expire. Note, the days to expiration are calculated from the date of issue.
e. This final field is where you enter the voucher barcodes/IDs, one-per-line. (Note: If using physical cards with a barcode for vouchers, you can scan each barcode into this field. If you are using your own ID system, type out the IDs or paste from a spreadsheet.)
After filling out the fields, select the green Add button.
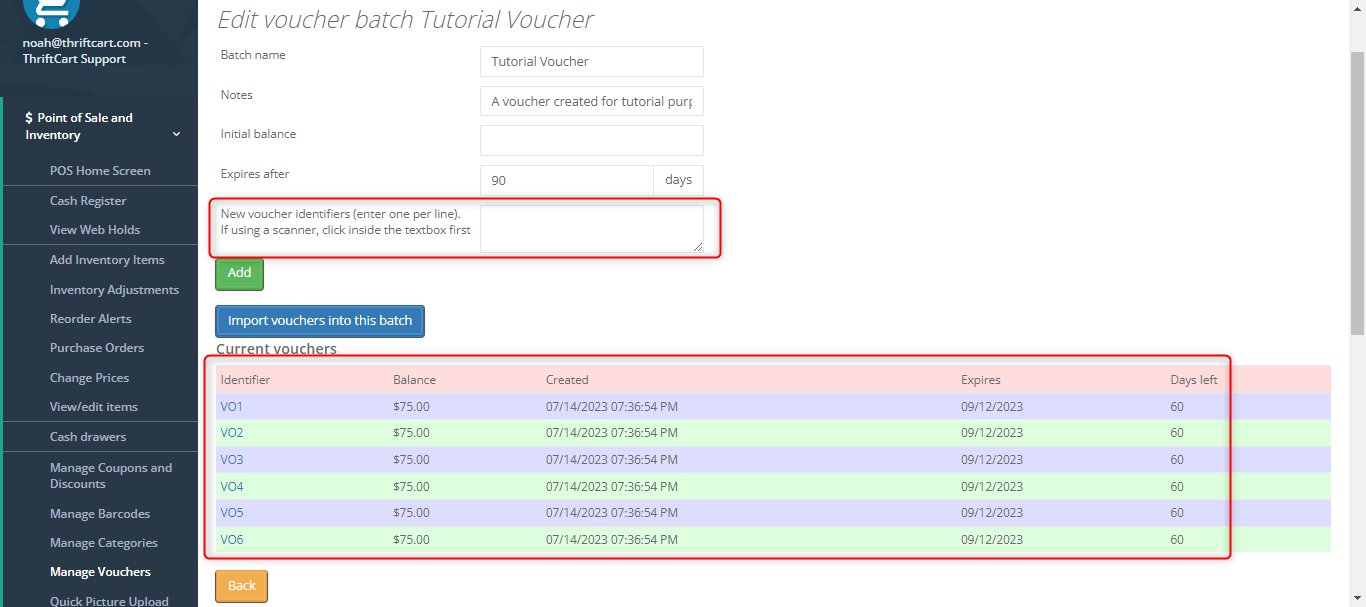
4) Upon adding the vouchers, you will be on the edit page for that voucher batch. On this page, you can add additional vouchers if desired.
Redeeming a voucher
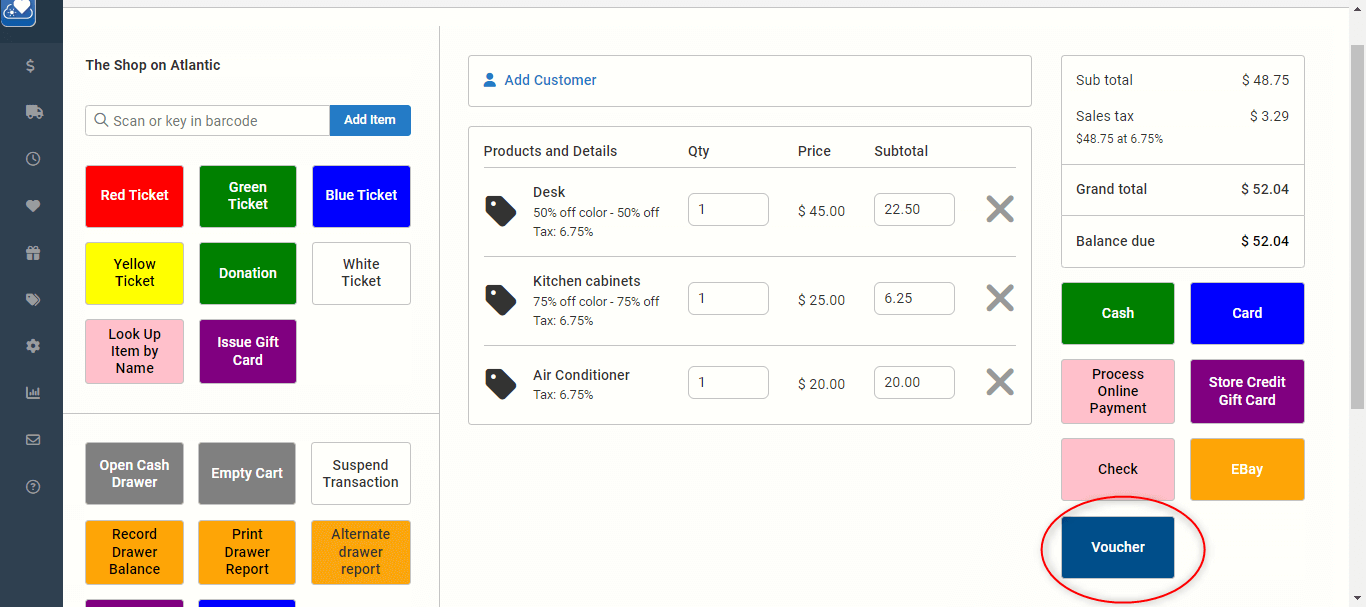
1) Simply add items into the cart in the register, and then select the Voucher payment type. (Note: the Voucher tender type is not on accounts by default, so please email support@thriftcart.com if you would like this activated.)
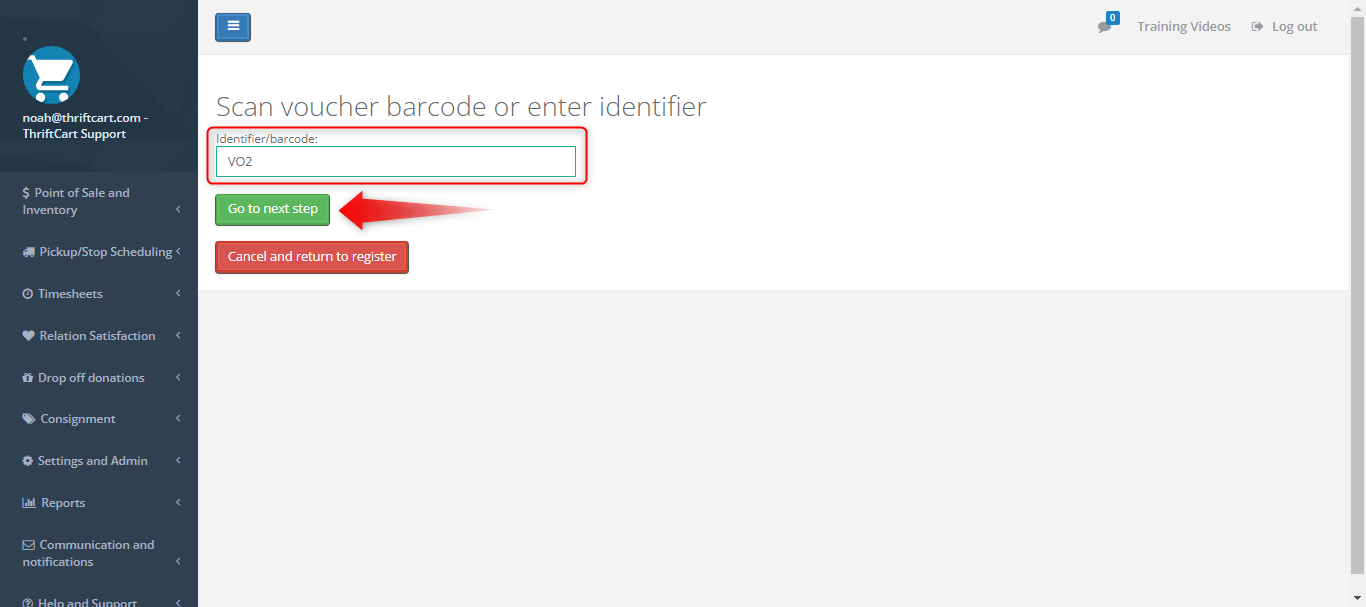
2) Then, scan or key-in the voucher ID. Once you’ve entered the barcode/ID, press the green Go to next step button.
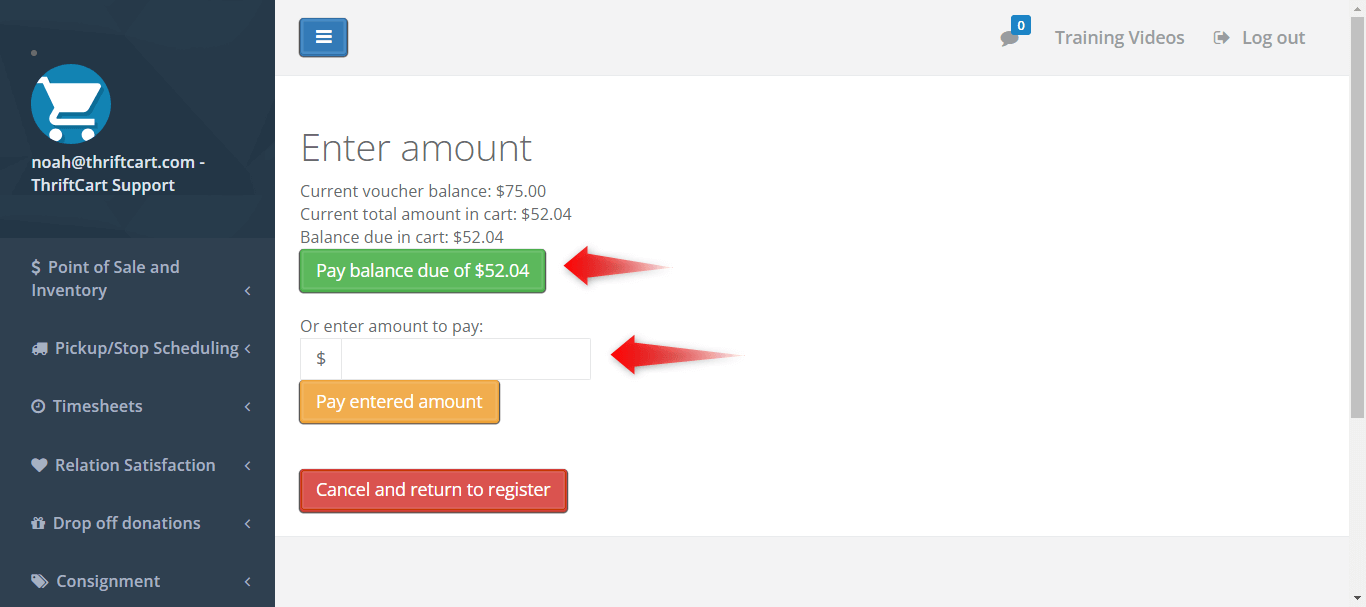
3) The resulting page displays the current voucher balance, cart total, balance due, and gives the option to pay the entire balance due (if the voucher exceeds the balance due) or a partial amount. After selecting how much of the voucher to redeem, confirm the amount, then complete the transaction as normal.
Reviewing and editing issued vouchers:
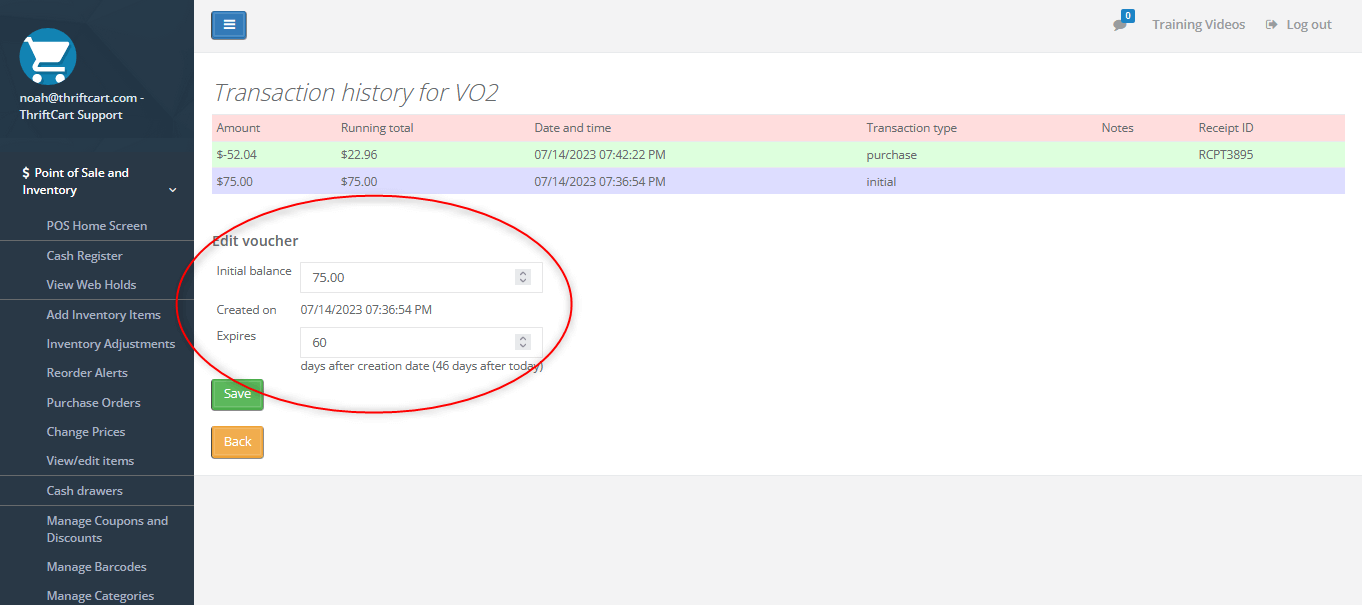
To review or edit issued vouchers, return to the Manage Vouchers page, and select the voucher batch you’d like to review. Here you can see the remaining balance on each voucher in that batch and select a voucher ID to edits it’s initial balance and/or expiration date.
